Comment

Bob “Dr. Mac” LeVitus's November User Group Tour Dates

I'm about to embark on my annual tour of Mac user groups in the great Northeast:

All meetings are free of charge; click the links for details.

At each meeting I'll be showing a few ways to work smarter on your Mac; demonstrating a few of my favorite things; and revealing the best things about being a Mac user...

Plus, there'll be questions, answers, and the kind of geeky camaraderie you just won't find elsewhere. 

Please stop by if you're in the neighborhood... User group meetings are more fun than you think.

Comment

2 Comments

Don't pull the trigger on installing macOS 10.12 Sierra until you read this:

                       Just say no... at least for a few days. 

macOS 10.12 Sierra comes out tomorrow; please don't install it until you read this:

Dr. Mac's Rants & Raves (Dr. Mac's Rants & Raves Episode 187 for The Mac Observer)

Or, if you can't read the whole thing (it's only a few hundred words) for whatever reason, here's the thrilling conclusion:

If you like to live dangerously, go ahead and install Sierra and iOS 10 the minute they come out. I will, but remember, I’m a trained professional. So, before you do something you might regret, I’d like to remind you one more time that it’s never as easy to downgrade as it was to upgrade and if you want to regress to a previous version after an upgrade you’ll have to erase the device, reinstall the previous version of the OS, and then restore your data from a backup. Not fun.

The bottom line is that when macOS Sierra 10.12.0 and iOS 10.0 finally arrive next month, wait for the first bug-fix update before you pull the trigger. My father used to tell me, “better safe than sorry,” and when it comes to point zero releases, I’m pretty sure he’s right.

Just say “no.”

This may be the best productivity advice I'll give you all year—DON'T INSTALL SIERRA TOMORROW! While it's not likely, do you have time for this if your upgrade goes bad???  

Like I said, it's not likely... but it could happen.

One last thing: You might want to read my column on beta testing operating systems: Dr. Mac's Guide to Apple Public Betas  (Dr. Mac's Rants & Raves Episode 183 for The Mac Observer). 

Why? Well, if you install tomorrow's release, you're basically installing a beta OS... So here's the bottom line: Installing Sierra tomorrow will probably be fine for most users... but if it's not fine, do you have time to deal with it tomorrow?

Ask yourself this: Do I absolutely, positively have to have Sierra tomorrow?  

I thought not.

So, wait until Saturday or for the inevitable 10.12.1 release. You won't be sorry.

2 Comments

3 Comments

How to become a Mac Dictator (Sierra edition)

This is an update of a previous blog post about setting up free dictation on your Mac. It’s slightly different in macOS Sierra than in previous versions of macOS, so please enjoy this delightful little ditty I like to call:

How to become a Mac Dictator (Sierra edition)

Have you always wanted to become a dictator? Not that kind! I meant the kind who dictates text to their Mac rather than typing. If you don’t like to type, or you can’t type due to repetitive strain injury (RSI) or other ailment, dictation may be just the ticket. And even if you love to type, dictation is a nice change of pace.

Dictation may also be faster than typing, especially if you speak clearly and quickly or you type slowly and poorly. We’ll look at an advanced third-party speech recognition program called Dragon for Mac in Chapter 3. But since Dragon costs up to $300 and there’s no free trial available, here’s how to dictate to your Mac without spending a dime.

How to become a Mac Dictator—step-by-step instructions for macOS Sierra users

  1. Launch System Preferences.

  2. Click the Keyboard icon.

  3. Click the Dictation tab.

  4. Click the On button.

  5. Click the Use Enhanced Dictation checkbox if you want to use dictation when you don’t have an Internet connection. It may take up to an hour for everything to download, so only check the box when you’ve got fast, reliable Internet access.

  6. (Optional) Choose a keyboard shortcut to toggle dictation on and off without revisiting System Preferences again. I use Control + Option + Command + D (D for Dictation).

  7. Choose a microphone by clicking the little inverted caret below the microphone icon and selecting the mic you want to use. The mic icon becomes your audio level meter; make a loud noise like a clap or a whoop and watch it bounce up and down.

Now, to dictate to your Mac, launch your favorite word processor and then turn on dictation using your keyboard shortcut. Start talking and watch the words appear on your screen like magic.

But wait! There's more! You can enable advanced dictation commands and then edit text and control actions on your Mac by voice!

  1. Launch System Preferences.

  2. Click the Accessibility icon.

  3. Click Dictation in the list on the left.

  4. Click the Dictation Commands button.

  5. Click the Enable Advanced Commands checkbox to speak advanced commands such as select the next or previous word, sentence or paragraph; go to the beginning or end of a word, sentence, paragraph; Undo; Redo; Cut, Copy or Paste; switch to or launch an application.

Finally, if you're using macOS Sierra, you can also talk to Siri. (Enable Siri in System Preferences-->Siri). Then try launching an app by name: Hey Siri—Launch Microsoft Word.

While macOS built-in dictation support is not as powerful and lacks many of the features of the commercial (around $200) Dragon For Mac, it works well enough for light use and you can't beat the price—it’s free.

One more thing: Since speech-to-text works decently with your Mac’s built-in mic, why not give it a try? Then, if you like it, consider buying yourself a decent headset mic and/or a copy of Dragon for Mac.

P. S. There is one last thing… If you liked what you just read, I'd be eternally grateful if you'd mention it to your Facebook and Twitter friends...

Thanks again for your support. 🤓


3 Comments

Comment

Pokemon Go is a Huge Security Risk by Adam Reeve—read it if you plan to play...

Pokemon Go is a Huge Security Risk by Adam Reeve is well worth reading if you are even thinking about playing the new Pokemon Go iOS app.

If you choose to play, at least the way it's currently set up, Pokemon Go will have full access to ALL OF YOUR GOOGLE ACCOUNT INFO. Which is to say the makers of Pokemon Go can: 

  • Read all your email
  • Send email as you
  • Access all your Google drive documents (including deleting them)
  • Look at your search history and your Maps navigation history
  • Access any private photos you may store in Google Photos
  • And a whole lot more

You really ought to read it if you intend to play... 

Comment

Comment

Ask me anything, LIVE: Sunday, July 3 @ 7PM Central (5PM Pacific/8PM Eastern)

I'm trying something new and will be hosting my first “Ask me anything,” a live streaming event, on Sunday July 3 at 7PM Central. You can post questions here in advance (your best bet): 

Click here to visit the Ask Me Anything page

Or wait and ask them during the event (not such a good bet).

Click here to join the live event (Sunday July 3 at 7PM Central)

Here's the official trailer:  

This is the official trailer for my Ask Me Anything event on Sunday, July 3 at 7PM Central. Visit tinyurl.com/go7bnzg to join us live at 7PM Sunday.

I hope to see you there Sunday night!

Comment

Comment

Who Wants to be a Dictator?

This is an excerpt from my upcoming e-book, Working Smarter for Mac Users. It's about setting up free dictation on your Mac, and while the book's still in beta (coming this fall), this piece is pretty much done. So please enjoy this delightful little ditty I like to call:

Who Wants to Be a Dictator?

Have you always wanted to become a dictator? Not that kind! I meant the kind who talks to their Mac instead of typing. If you don’t like to type, or you can’t type due to repetitive strain injury (RSI) or other ailment, dictation may be just the ticket. And even if you love to type, dictation is a nice change of pace.

Dictation may also be faster than typing, especially if you speak clearly and quickly or you type slowly and poorly. We’ll look at an advanced third-party speech recognition program called Dragon for Mac in Chapter 3. But since Dragon costs up to $200 and there’s no free trial available, here’s how to dictate to your Mac without spending a dime.

                                           Click to enlarge...

How to become a (Mac) dictator—the step-by-step instructions:

  1. Launch System Preferences.
  2. Click the Dictation & Speech icon.
  3. Click the Dictation tab.
  4. Click the On button.
  5. Click the Use Enhanced Dictation checkbox if you want to use dictation when you don’t have an Internet connection. It may take up to an hour for everything to download, so only check the box when you’ve got fast, reliable Internet access.
  6. (Optional) Choose a keyboard shortcut to toggle dictation on and off without revisiting System Preferences again. I use Control + Option + Command + D (for dictation).
  7. Choose a microphone by clicking the little inverted caret below the microphone icon and selecting the mic you want to use. The mic icon becomes your audio level meter; make a loud noise like a clap or a whoop and watch it bounce up and down.

Now, to dictate to your Mac, launch your favorite word processor and then turn on dictation using your keyboard shortcut. Start talking and watch the words appear on your screen like magic. But wait! There's more! You can enable advanced dictation commands and then edit text and control actions on your Mac by voice!

                                          Click to enlarge...

  1. Launch System Preferences.
  2. Click the Accessibility icon.
  3. Click Dictation in the list on the left.
  4. Click the Dictation Commands button.
  5. Click the Enable Advanced Commands checkbox to speak advanced commands such as select the next or previous word, sentence or paragraph; go to the beginning or end of a word, sentence, paragraph; Undo; Redo; Cut, Copy or Paste; switch to or launch an application.

While the OS X rendition is not as powerful and lacks many of the features of Dragon For Mac, it works well enough for light use and you can't beat the price—it’s absolutely free.

One more thing: Since speech-to-text works decently with your Mac’s built-in mic, why not give it a try? Then, if you like it, consider buying yourself a decent headset mic and/or a copy of Dragon for Mac.

P. S. There is one last thing… If you liked what you just read, I'd be eternally grateful if you'd mention it to your Facebook and Twitter friends...

Thanks again for your support. 🤓

Comment

Comment

Why the Hell Haven’t You Customized Your Toolbar and Sidebar???

This entry is all about the Toolbar and Sidebar in Finder windows, but don't worry—I won’t bore you a feature-by-feature description of every Toolbar and Sidebar feature. Instead, I’ve written a delightful little ditty about making the Sidebar and Toolbar work smarter, a tantalizing little tale I call:

Why the Hell Haven’t You Customized Your Toolbar and Sidebar???

I’m teaching a class on Mac basics at University of Texas Informal Classes and It freaks me out that not a single one of my students knew you could customize the Toolbar and Sidebar. And that’s a shame since they’re two powerful features that have been around since time immemorial and are common to all Finder windows in all versions of OS X.

If your Sidebar and Toolbar are still just as Apple shipped them, you’re about to see how to make them über-useful. And for those who’ve customized their Sidebar or Toolbar, let me show you a few of my favorite tricks for making them work smarter.

On Making Your Toolbar Work Smarter

You probably know that in the Finder, you can choose View-->Customize Toolbar to add or remove items from the Toolbar. And, if you didn’t, you do now:

What you probably don’t know is that you can also add any folder or file to your Toolbar by holding down the Command key and dragging the item onto the Toolbar.

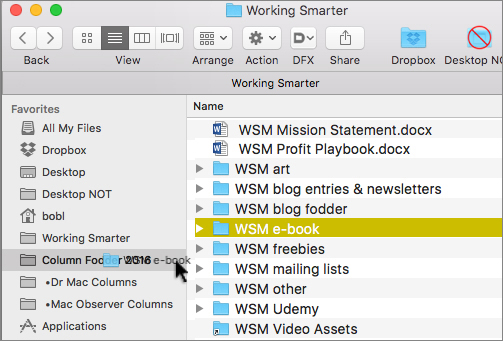
In the figure above, I’ve added the Dropbox, Work, and Desktop NOT folders to my Toolbar, making it easy for me to drag files or folders onto any of them or open 'em in their own tab with a single click.

The Command key is also the key (haha) to several other useful Toolbar tricks. For one, you may know that you can rearrange items on the toolbar as long as the Customize Toolbar sheet is open… But it’s often faster to just press Command and rearrange your Toolbar icons without involving the Customize Toolbar sheet.

The Command key is also the key (haha again) to removing items you don't want in the Toolbar anymore. To get rid of an item in the Toolbar, press Command and drag the icon off the Toolbar; when you release the mouse button, the item will disappear with a satisfying “poof.” Or, you can invokie the Customize Toolbar sheet and drag them off without the Command key, but what fun is that?

Here’s one final Toolbar tip before we move on: If you often forget what your Toolbar icons mean, choose Icon and Text from the pop-up Show menu in the lower left corner of the Customize Toolbar sheet. This will display the item’s name below its icon, as shown in the previous figure. Or, hover the pointer over any item in the Toolbar for a few seconds and its description appears as a tool tip (Perform tasks with the selected items in the figure below):

One last thing: If you try to drag a file or folder to the Toolbar and it won’t stick, chances are you’re trying to drag an alias. You can’t do that. Instead, find the original file by clicking on the alias and choosing File-->Show Original (or Command + R) and then dragging the original file onto the Toolbar.

On Making Your Sidebar Work Smarter

Many users underestimate the convenience of the Sidebar, never bothering to customize it to suit their needs. That’s a big mistake. Although Apple populates a stock Sidebar with some useful folders, if you want to make it really useful, you need to populate it with the folders you use most.

To add a folder to the sidebar (WSM e-book in this example), drag the folder onto the Sidebar. Make sure it’s positioned between two folders and you see a little line between the folders (as shown on the left in the figure below). When you release the mouse button, WSM e-book appears in the Sidebar between the two folders where the line was (as shown on the right in the figure below).

If you drag the folder onto another folder in the Sidebar (the Column Fodder folder in the figure below), instead of dragging it between two folders (Dr. Mac Columns and Mac Observer Columns in the figure above), you’ll move the WSM e-book folder into the Column Fodder folder instead of adding it to the Sidebar.

To remove a folder from your Sidebar, just drag it out of the Sidebar until you see a little X in a circle. When you do, release the mouse button and the folder disappears with a satisfying “poof.”

By the way, folders in the Sidebar are merely aliases to the actual folder—removing a folder from the Sidebar only removes the alias from the Sidebar—the folder itself remains in place and untouched.

The thing that makes the Sidebar so uniquely useful is that it appears in both Open and Save dialogs as well as Finder windows. Whatever appears in the Sidebar in the Finder, as shown on the left in the figure below, also appears in the Sidebar of Open and Save dialogs, as shown on the right.

My Sidebar is always in a state of flux. For example, I add project folders (like Working Smarter) when I’m actively working on them, and remove them when that project is done. I also add folders I frequently save files into such as Column Fodder and Recipes folders.

The point is: There’s no reason not to add every folder you use regularly to the Sidebar.

Last but not least, sharp-eyed readers have surely noticed that I have several folders in both the Toolbar and the Sidebar. My answer to that is: Why not? I use those three folders more than the others; having them available in more than one place is convenient. There’s no penalty for having multiple aliases of a folder… So why wouldn’t I make it as easy as possible to access folders I use most?

Comment

Comment

Develop this habit to eliminate spontaneous iPhone dialing

Help stamp out butt-dialing! Click it (the lock button) before you stash it (your iPhone)!

Has This Happened to You?

  • Your iPhone SPONTANEOUSLY MADE A PHONE CALL FOR NO APPARENT REASON?

  • Friends say, "I'm returning your call," EVEN THOUGH YOU KNOW YOU DIDN'T CALL THEM?

  • You see phone numbers in your Recent Calls list BUT YOU KNOW YOU DIDN'T DIAL THEM?  

If any of these has happened to you, I'm pretty sure I know why. And, I'm also pretty sure I know how you can develop a habit to prevent it from ever happening again.   

The reason it happens, you see, is that you almost certainly didn't lock your phone before you stuck it into your pocket, purse, pack, cup holder, or whatever. With an unlocked phone it's far too easy to accidentally dial or redial a phone number without knowing it. 

The reason I'm relatively certain that's why your iPhone is making those calls is that I forced myself to adopt a new habit and I now press my iPhone's Lock button religiously before stashing it in my pocket (or anywhere else). I rarely forget to lock it anymore and I haven't butt-dialed anyone in months.

Give it a shot. Make a commitment to remember not to stash your phone without locking it first. In a few weeks, you won't even think about it—it'll become a habit and you'll do it automatically.      

So just remember to click it (the Lock button) before you stash it (your iPhone) and you'll never have to suffer an embarrassing butt-dialing incident again. 

One last thing: I'd like to thank Mac Geek Gab (my favorite podcast), and its hosts Dave Hamilton and John F. Braun for today's topic. They had a lengthy discussion in their inimitable manner in MGG Episode 607 and I couldn't get it out of my head until I wrote this.

Thanks Dave and John. I feel better.  🤓

Comment

2 Comments

Move many files into a folder with one click: a 13-second tutorial

A 13-second tutorial on how to move many files into a new folder with a single click.

I made this for Working Smarter for Mac Users, my upcoming e-book. But I like you too much to make you wait months to see my 13 second masterpiece. So, if you want to learn how to move many files into a folder with one click, here's my 13-second tutorial:  

If you liked it, I'd appreciate it if you'd say something in the comments. If you didn't like it, I'd still appreciate it if you'd say something in the comments.

Thanks!


2 Comments

4 Comments

Batch rename files: a 15-second tutorial!

I made this for Working Smarter for Mac Users, my upcoming e-book. But I like you too much to make you wait months to see my 15 second masterpiece. So, if you want to learn how to batch rename files (for free), watch this:  

If you liked it, I'd appreciate it if you'd say something in the comments. If you didn't like it, I'd still appreciate it if you'd say something in the comments.

Thanks!

4 Comments

Comment

Column about my trip to Germany

Check it out... I just finished a column about my trip to Germany, featuring my close encounters with a pair of world leaders, the famous river surfers of Munich, and IBM Watson, up close and personal

It's at The Mac Observer (of course). Click here to read it.


Comment

Comment

I'm Back!

I'm back from my trip to Germany and just finished posting all the pix and videos I shot there. If you're interested, you'll find them—all 400 or so of them—here.

Or, browse the embedded gallery below if you prefer. (Tip: Use the Next and Previous buttons on the right and left edges of the image if you want to browse without leaving this page. If you click anywhere else on the image, the Flickr gallery will open in a new window and display the picture or video.) 

Either way, I hope you enjoy looking at them as much as I enjoyed taking them. 

Germany 2016 (second try)

Comment

4 Comments

Quick Desktop Cleanup Tip

My desktop was a mess. I had more than two dozen icons strewn about, and as often as not opened or dragged the wrong item, or dragged two or more items when I meant to only grab one. I've also dragged extra files or folders to the Trash unknowingly along with items I actually wanted to drag to the Trash.    

Here's what it looked like before I cleaned it up: 

The upper-right corner of my desktop (before). 

So I decided I'd create a folder on my Desktop to hold all the things that formerly appeared right on the Desktop. I called the folder Desktop???NOT!!!, set it to icon view, and rearranged the icons just the way I like them. The result looks like this: 

The upper-right corner of my desktop (after). 

I like this arrangement a lot better so far and find it less problematic than having myriad icons scattered about my desktop. 

If your desktop is a mess, give it a try. 

That's all for now. 

4 Comments

4 Comments

Do you think Consumer Reports will run this in the Selling It column?

You know how Consumer Reports magazine has the Selling It column on the inside back cover? You know, the one that pokes fun at goofs and glitches in ads and solicitations?

I recently received this direct mail piece from none other than Consumer Reports

I thought the way they redefined the word "free" was a goof (or, at least a glitch), so I submitted it last month.

I'd say the odds of it running in the magazine are slim and none. But I could be wrong and I hope they have the balls (and sense of humor) to run it. We'll see. 

For what it's worth, I happen to like Consumer Reports a lot, usually, and I was a sad to have to bust their chops this way. On the other hand, questionable marketing tactics should be called out, don't you think?

Well, I do and I did! Comments welcome!  

Hashtag: #CRSellingIt

Consumer Reports' Selling It column: As seen on the inside back cover each month (this one's from May 2016…

4 Comments

13 Comments

iTunes Must Die! now a free download!!!

After being rejected by the iTunes Store and selling a whopping two copies, I'm giving up on my dream of becoming the next Weird Al.

So, if you'd like to download and enjoy a free copy of iTunes Must Die, click here.

If you'd like to download the lyrics and guitar chords to iTunes Must Dieclick here.


And by popular request, here are two short excerpts from the uncompleted music video for iTunes Must Die:

Note that both movies were shot with Bad Robot's Action Movie FX.

Enjoy! 

click me to download your free copy of iTunes Must Die!

click me to download your free copy of iTunes Must Die!

13 Comments

4 Comments

Switch Apps on your iPhone 6s or 6s Plus Without Touching the Home Button!

I usually switch apps using the "double-tap the home button to access the app switcher" shortcut, but recently learned that there's an easier way. Excuse me if you already know this one, but it was new to me (a few months ago) and most of the people I've shown it to have been surprised.

I made a short (42 second) video that shows both techniques—the old school double-tap the home button technique first, followed by the newfangled 3D press/swipe on the left edge of the screen technique.

Enjoy!

There are two ways to switch apps on the iPhone 6s and 6s Plus. The first, better-known one is double-tapping the Home button. Do you know the other way? Watch this 40-second video and you will!

4 Comments

27 Comments

A $25 Stand-Up Desk + a Microsoft Tech Support Joke

A $25 stand-up desk? You betcha!

A $25 stand-up desk? You betcha!

In addition to making progress on my Working Smarter for Mac Users eBook and online course last week, I managed to write both a column and an editorial for Mac Observer, something I rarely have the time or inclination for. 

The column is: A Usable Stand-Up Desk for $25? Yes! And, in fact, I thought the $25 stand-up desk—called Oristand—was so cool I made a video of assembling one in under 30 seconds. The editorial is: Microsoft OneDrive Drives Me Nuts, and it includes a hilarious (and totally appropriate) Microsoft Tech Support joke. 

That's all I've got today, but stay tuned and for heaven's sake sign up for my newsletter if you haven't already!

Links

Read my Standup Desk column.

Read my OneDrive Drives Me NUTS editorial.

Watch my Stand-up Desk video.

Subscribe to my Working Smarter for Mac Users newsletter.

27 Comments

Comment

Desktop Printer Ink Wars Parts I & II

Desktop Printer Ink Wars Part I

Desktop Printer Ink Wars Part I

I was understandably excited when not one but two printer makers offered me an opportunity to test their new initiatives for making inkjet printer ink more palatable to consumers. 

Desktop Printer Ink Wars Part II

Desktop Printer Ink Wars Part II

Epson’s approach features five new “EcoTank” printers, which include huge ink reservoirs that are big enough for up to two years worth of ink—the equivalent of 20 sets of ink cartridges.

Hewlett-Packard (HP) has a radically different approach, offering the Instant Ink program, “designed to save consumers up to 50 percent on the cost of original HP ink."

Read all about it at The Mac Observer
Read Part I here
Read Part II here

That's all for now!

Comment

Comment

Serenity Caldwell's Review of the Pencil (Hand-Drawn with an Pencil)

I reviewed the iPad Pro and Pencil a few weeks ago and lamented that I couldn't convey just how good the Pencil/iPad Pro was for drawing because I can't draw.

Fortunately for you, Serenity Caldwell drew an awesome review of it for iMore, so if you want to know how it feels to use an iPad Pro and an Pencil to draw, read her hand-drawn review here. 

I don't know Serenity Caldwell, but her review of the Pencil is awesome and says all the things I was thinking but couldn't say (say it along with me this time) because I can't draw.

Thank you, Serenity, wherever you are!

Comment